Cutting Corners Design is now called Bags and Seams Design!

Author
Sarah is a successful pattern designer for bags, the founder of Bags and Seams Design, and a BERNINA instructor. With great passion, she helps beginners discover their enthusiasm for sewing bags. In her high-quality courses, she teaches the necessary skills step by step and ensures motivating sewing experiences with tangible results.
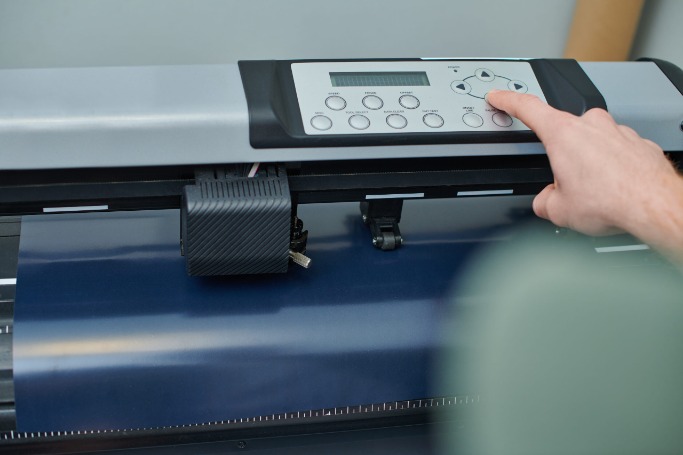
During the plotting process, an electronic cutting plotter cuts out digital designs from materials such as paper, vinyl film, flex film, flock film, sticker paper, or thin cardboard.
A plotter is a great addition to your sewing setup: you can quickly and easily plot any design, choose colors and sizes, and permanently apply them to your fabrics. But even in your sewing room, a plotter is a great way to bring your creative ideas to life.
In this blog post, I’ll explain the basics you need to understand to choose a plotter or get started with your new plotter.
In the world of creative hobbies, “plotting” usually refers to the computer-controlled cutting of materials.
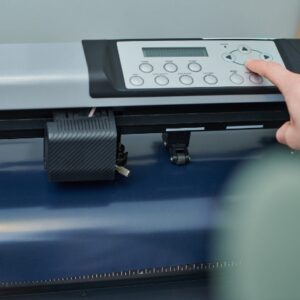
A cutting plotter looks similar to a printer. However, instead of applying ink to paper, it moves a small blade along the lines of a digital file. This cuts the design out of vinyl, paper, or another suitable material.
The plotter does not normally print the design. It simply cuts along the specified lines. An exception to this are so-called “print-then-cut” or “print-and-cut” projects. In these projects, a design is first printed using a standard printer and then cut out by the plotter along its outline. Compatible devices recognize printed registration marks or sensor marks for this purpose.
With a plotter, you can create the following projects, among others:
Depending on the model, modern hobby plotters can cut not only self-adhesive vinyl and iron-on transfer paper, but also paper, cardstock, sticker paper, fabric, and various specialty materials. The specific materials that can be cut depend on the machine, the blade, the cutting mat, and the thickness of the material.
The basic process is similar for most cutting plotters:
1. Create or purchase a plotter file.
2. Open the file in your plotter’s software.
3. Adjust the size, orientation, and position of the design.
4. Select the material and the appropriate cutting settings.
5. Place the material on the cutting mat or directly into the plotter.
6. If possible, perform a test cut.
7. The plotter cuts out the design.
8. Remove the unwanted parts.
9. Transfer the design to the desired object.
The process of removing the excess film is called weeding. A weeding hook is usually used for this.
For multicolored or multi-part designs, the individual elements are cut out one after another and then assembled or transferred in several steps.
Although a cutting plotter looks similar to a printer, it does not typically apply ink to the material. Instead, it moves a small blade along the lines of a plotter file to cut out shapes, text, or designs from vinyl, paper, or other suitable materials. So the color doesn't come from the plotter, but from the material used. With flex film, flock film, or vinyl film, your choice of film determines the color of the finished design. Multicolored designs are often created by combining several individually cut layers of film, which are then assembled or ironed on one after another.
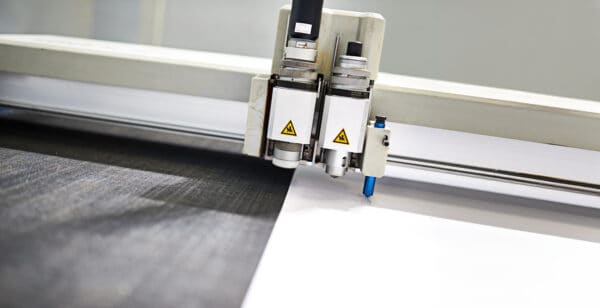
Compact hobby plotters with user-friendly software and a good selection of material settings are ideal for beginners.
Well-known devices differ in the following ways, among others:
For simple projects using vinyl film, flex film, paper, and cardboard, a classic entry-level model is usually sufficient.
If you want to cut thicker materials—such as fabric, leather, gray cardboard, or wood—in the future, you’ll need a more powerful machine and special tools, depending on the material.
Some plotters can feed certain manufacturer-specific materials without a cutting mat. Other materials or films from other manufacturers must still be used on a compatible cutting mat.
Every cutting plotter uses software or an app. With it, you can:
Before purchasing a plotter file, check to see if your software can open the file format being offered.
With some programs, certain file formats can only be opened using a paid version of the software. Silhouette, for example, notes that opening SVG files requires a corresponding paid edition of Silhouette Studio.
A cutting mat has a slightly tacky surface. It holds the material in place while you’re cutting.
Depending on the manufacturer, mats are available with varying levels of adhesive strength:
The cutting mat should be suitable for the material. A mat that is too sticky can damage thin paper. A mat that is not sticky enough may not hold the material securely enough.
Regularly remove lint, paper scraps, and pieces of film from the mat. If it gets too dirty, the material may shift during cutting.
The knife cuts the lines of the design out of the material.
A fine-cut blade is usually used for vinyl film, flex film, paper, and thin cardboard. For thicker or special materials, deep-cut blades, kraft blades, or roller blades may be required.
A greater blade depth does not automatically mean a better cut. A blade that protrudes too far can cut through the backing paper, damage the cutting mat, or distort delicate designs.
If your cuts are uneven, you should first check:
For standard vinyl films and most iron-on films, Silhouette recommends using an AutoBlade or a manual 1-mm blade. An unnecessarily deep blade setting can damage the backing material, the cutting mat, or the cutting bar.
After cutting, all pieces of film that are not part of the finished design must be removed.
A weeding hook has a fine tip that you can use to lift small inner areas and leftover film.
The following are also particularly useful:
When weeding, start with the large outer areas if possible. Then remove small elements, such as the inner areas of letters.
Before transferring the item, check carefully to make sure that all unnecessary parts have been removed.
A squeegee is a flat tool made of plastic, felt, or rubber.
It is used primarily with self-adhesive vinyl film. Use the squeegee to press the transfer film onto the cut design and then transfer the film to the desired surface.
A squeegee helps with this:
Transfer film is required for self-adhesive vinyl film.
After the design has been weeded, the transfer film is placed on the front of the design. It picks up all the pieces at once and holds them in place during the transfer.
Next, remove the backing paper from the vinyl film and apply the design to the cleaned surface.
Transfer films are available in various levels of adhesive strength. Transfer film with very strong adhesive properties can damage delicate or matte vinyl film. Transfer film with too weak adhesive properties may not reliably pick up small details.
For cut-out lettering and symbols, ORAFOL offers, for example, transparent and semi-transparent transfer films and transfer papers.
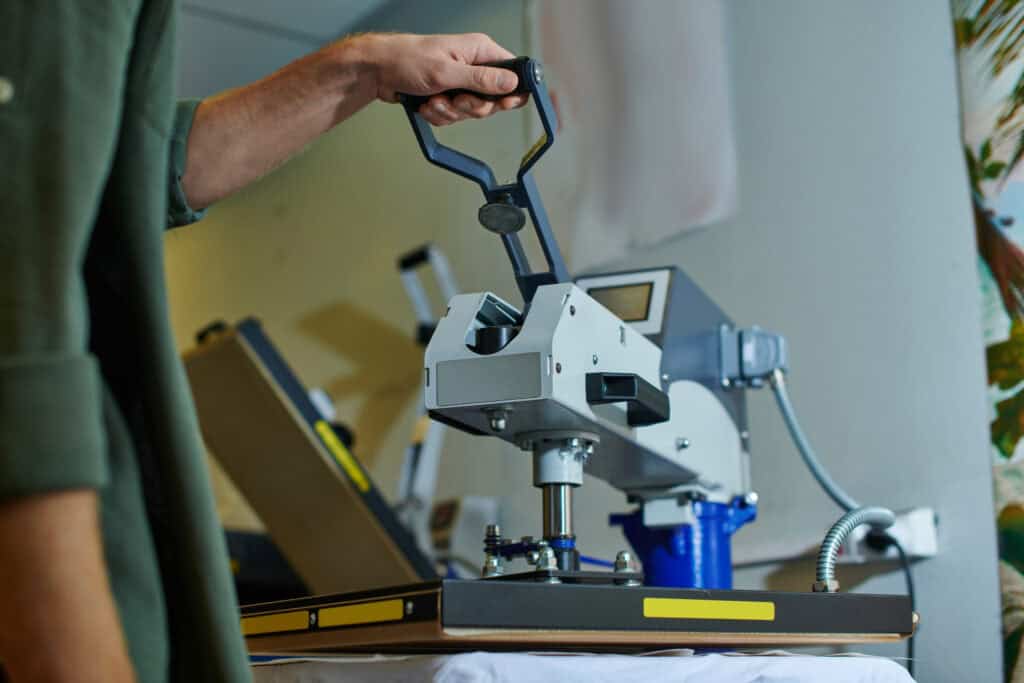
Iron-on transfers are applied to textiles using heat and pressure.
Depending on the type of film, you can use the following:
A heat press distributes heat and pressure more evenly than an iron. For occasional small projects, however, an iron may still be sufficient, provided the transfer paper used is approved for that purpose.
Use a firm, heat-resistant surface. A soft ironing board can reduce the necessary pressure.
The manufacturer’s specifications regarding the following are always crucial:
Insufficient heat, time, or pressure can cause the film to peel off. Too much heat or pressing for too long can also cause damage and adhesion problems.
The following are also helpful for getting started:
Paper is ideal for cards, gift tags, decorations, and packaging.
Choose a cutting mat that’s appropriate for the thickness of the paper. Thin paper requires a mat with less grip than thicker cardstock.
Carefully remove the paper from the mat. It’s better to bend the cutting mat away from the paper rather than pulling the paper up forcefully. This helps reduce waves and creases.
Cardboard is suitable for:
Thick cardboard may require multiple passes or a special blade.
With very small or delicate shapes, there is a risk that the corners will tear off. A test cut will help you find the right setting.
Self-adhesive vinyl film has an adhesive layer on the back.
It is suitable for smooth, clean, and grease-free surfaces such as:
Vinyl film is available in permanent and removable varieties.
Removable vinyl film is suitable, for example, for temporary decorations or wall designs. Permanent vinyl film is intended for longer-term signage.
ORAFOL describes the permanent ORACAL 651 film as a plotter film for short- and medium-term lettering and decorations. ORACAL 631, on the other hand, has a removable adhesive and is designed for smooth, sealed indoor surfaces.
Self-adhesive vinyl film is not typically used on fabric surfaces. It does not adhere well to fabric and may peel off due to movement or washing.
Iron-on film is also known as textile film, heat transfer film, or heat transfer vinyl.
It contains a heat-activated adhesive. After cutting and weeding, the design is transferred to the fabric using a heat press or a suitable iron.
Iron-on transfer film is most commonly used for the following materials:
Not every iron-on transfer is suitable for every type of fabric. Nylon, coated fabrics, sublimated polyester, and highly elastic fabrics often require special transfers with lower pressing temperatures or greater stretchability.
Flex foil is a smooth and relatively thin iron-on transfer foil.
It’s a good choice for beginners because it’s usually easy to cut, weed, and apply.
Flex foil is particularly suitable for:
The exact temperature and pressing time depend on the specific product. Therefore, do not use the same settings for every flex foil.
Flock film has a soft, velvety surface and appears slightly thicker than regular flex film.
It is suitable for designs that are meant to have a tactile texture. Flock film can be used, for example, for:
Siser describes flock film as soft, suede-like, and slightly raised. As a result, it can resemble embroidery.
Very small or intricate details can be more difficult to cut and weed when using thick flock foil. For your first project, we therefore recommend choosing a clear design that isn’t too small.
In addition to traditional flex and flock foils, there are numerous specialty materials:
Specialty films may require different cutting and pressing conditions. For example, puff film reacts during the pressing process, creating a raised surface. Depending on the product, stretchable or low-temperature films may be better suited for elastic or heat-sensitive textiles.
When learning to plot, it’s best to start with a smooth, solid-color flex film. Once you’ve mastered the basics, you can try out different effects.
With sticker paper and a print-and-cut feature, you can make colorful printed stickers.
The process differs from the traditional cutting of a single-color film:
1. The design is prepared in the software.
2. A printer prints the design along with sensor marks.
3. The printed sheet is placed on the cutting mat.
4. The plotter detects the marks.
5. The machine cuts out the outline of the design.
For projects like these, in addition to the plotter, you’ll need a compatible printer and suitable printable material.
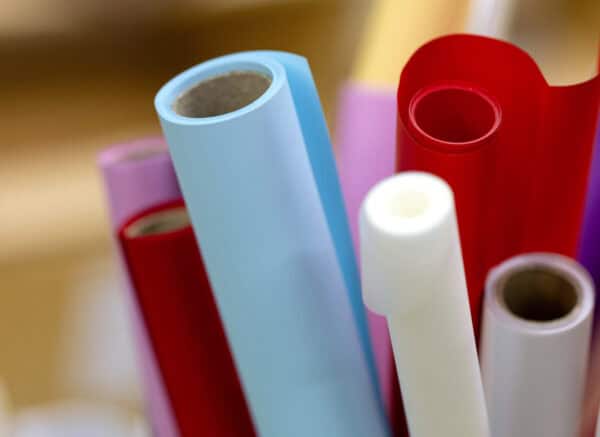
It's not just the size of the design that determines how easy it is to weed a vinyl sheet. With very dark, glossy, or highly reflective films, the cut lines can sometimes be difficult to see. A light-colored work surface, side lighting, or an illuminated weeding mat can make the lines more visible. Gently bending the film can also help you see the cut-out shapes. Be careful not to bend the backing so much that small parts of the design come loose unintentionally.
A plotter file contains shapes, lines, or areas that can be processed by plotter software.
Vector files are particularly well-suited for this purpose. They are not made up of individual pixels, but rather of mathematically defined lines and shapes. This means they can be enlarged or reduced in size without becoming blurry.
File formats commonly offered include:
Not every file format works the same way in every software program.
SVG and DXF files typically contain vector lines. PNG and JPG files are image files. Depending on the software, they must first be traced, cropped, or used as print-and-cut files.
A plotter file can contain multiple layers. For a multicolor design, each color can be created as a separate layer.
Before you buy a plotter file or start downloading one, check the following:
1. Is the required file format included?
2. Can your software open this format?
3. Is the design suitable for your project?
4. Does the file contain very small or intricate details?
5. Are the layers clearly separated?
6. Are there instructions or preview images?
7. Is the file suitable for beginners?
8. Are you allowed to sell finished products made with it?
9. Are you allowed to modify the file?
10. What commercial license terms apply?
A purchased plotter file may not normally be shared, given away, or resold as a digital file.
Even free files may be available only for personal use. Therefore, always check the license terms of the respective store or designer.
No. A plotter file contains cutting lines, shapes, or printed graphics for a cutting plotter.
An embroidery file, on the other hand, contains specific stitch information for an embroidery machine. This includes, for example, stitch positions, stitch types, and color changes.
Therefore, an SVG file cannot be embroidered automatically by an embroidery machine. Similarly, a machine embroidery file cannot simply be used as a plotter file.
For your first project, a simple lettering design made from flex foil on a cotton T-shirt, a pillowcase, or a cloth bag is a great choice.
Select a simple plotter file using:
Very small text and delicate cursive fonts are challenging to weed.
Open the plotter file in your machine’s software.
Check to make sure all layers and lines are displayed correctly. Remove duplicate cut lines and any unnecessary elements.
Measure the area onto which the design is to be transferred.
Adjust the size in the software. Make sure the aspect ratio remains locked so that the image isn’t accidentally distorted.
If you’re unsure, make a paper template. First, cut out the design from plain paper and place it on the object. This way, you can assess the position and size without using any film.
With traditional iron-on transfers, the design usually needs to be mirrored before cutting.
Place the vinyl with the glossy backing side facing down on the cutting mat. The plotter cuts through the backing into the vinyl itself. After weeding, flip the design over and place it on the fabric with the correct orientation.
For standard iron-on transfers, Cricut specifically advises users to mirror the design before cutting and to place the glossy backing sheet face down on the cutting mat.
Not every printable textile material is mirrored. With printable iron-on, the procedure may vary depending on the product. For example, in the Cricut instructions for printable iron-on, the design is not mirrored.
Therefore, always read the instructions for the film you are using.
Cut a piece of foil that’s big enough.
When placing standard iron-on vinyl on the cutting mat, usually place it with the matte side facing up and the glossy backing side facing down.
Smooth out the material. Make sure there are no wrinkles, ripples, or air bubbles.
Self-adhesive vinyl film is placed on the mat with the backing paper facing down.
In the plotter software, select the material you are actually using.
Among other things, this setting affects:
Don’t rely solely on general settings such as “vinyl” or “iron-on transfer.” Different manufacturers, surfaces, and material thicknesses may require different settings.
A test cut is a small shape that is cut out before the actual design.
If the flex or vinyl film is set up correctly, the film should be cut cleanly without completely cutting through the backing paper.
If the shape cannot be cleanly weeded, check:
If possible, make a test cut before working with any new material. Manufacturers recommend test cuts, especially for unfamiliar, thicker, or delicate materials.
Start the cutting process.
Make sure there is enough space in front of and behind the plotter. The cutting mat or material moves through the machine during cutting.
Do not move the plotter while it is cutting.
If possible, check the cut before you completely unload the mat or remove the material.
Carefully lift a small corner or an inner piece with the weeding tool.
If the cut is not yet complete, some machines allow for an additional cutting pass, as long as the mat and material have not been moved.
First, remove the large excess piece of plastic wrap.
Then work from the outside in, removing small elements from letters, symbols, and spaces.
Have the plotter file or a preview ready. This will make it easier for you to see which parts need to be removed.
If possible, pre-wash new fabrics, provided the care instructions and your project allow it.
Do not use fabric softener, as residue can interfere with adhesion.
Lay the fabric flat on a sturdy, heat-resistant surface. Remove lint and hair with a lint roller.
Briefly press the surface according to the film manufacturer’s instructions. This helps reduce moisture and wrinkles. For example, Siser recommends briefly pre-pressing a common flex film before transferring the design.
Place the weeded design on the fabric with the backing sheet facing up.
Measure the distances to edges, seams, and center lines. If necessary, secure the design with heat-resistant tape.
Make sure there are no thick seams, zippers, buttons, or cords under the pressing surface. Such protrusions can cause the pressure to be distributed unevenly.
Set the temperature, pressing time, and pressure according to the manufacturer’s instructions.
Press the design evenly. Do not move the iron back and forth as you would when ironing normally, unless the film manufacturer recommends otherwise.
For a large design, work in sections with the iron. Each area must receive sufficient heat and pressure.
Depending on the iron-on transfer, the backing film:
deducted.
Wait for the specified amount of time. If the film lifts away from the fabric when you peel it off, replace the backing film and press it down again according to the manufacturer’s instructions.
Let the design cool completely.
Do not wash the fabric right away. Follow the waiting period and care instructions provided by the film manufacturer.
Printed or vinyl-decorated textiles should be washed inside out frequently. High temperatures, harsh detergents, and vigorous agitation can damage the surface of the vinyl.
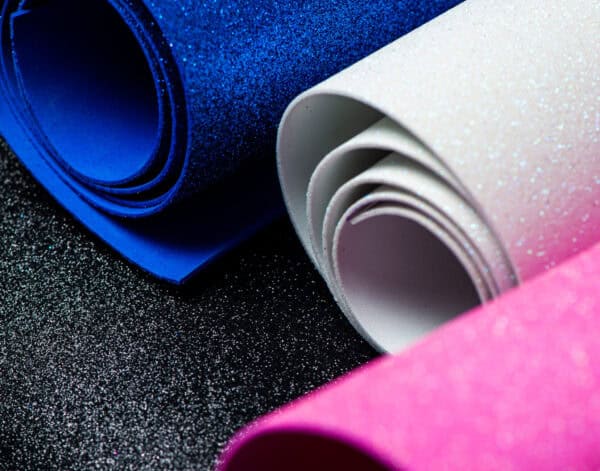
The application process for self-adhesive vinyl film differs from that of iron-on transfer film.
The surface must:
be.
Clean glass, metal, or plastic with a suitable cleaning agent. Check first to see if the cleaning agent could damage the surface.
Remove all unnecessary pieces of film. Pay special attention to the inner surfaces of small letters.
Place the transfer film on the design. Use the squeegee to smooth it from the center outward. Flip the design over and, if necessary, use the squeegee to smooth the back as well.
Slowly peel off the backing paper at a shallow angle. If any parts remain on the paper, put it back and scrape again.
First, carefully position the design. For small designs, you can place the entire piece on the surface. For larger lettering, a hinge method using tape works well.
Use a squeegee to firmly press the design from the center outward.
Peel off the transfer film slowly and evenly. If individual elements lift up, replace the film and press down on that area again.
Flex foil and flock foil are suitable for textiles such as T-shirts, pillows, cloth bags, or cotton bags. Both are applied to the material using heat and pressure.
Flex foil is smooth, thin, and available in many colors and with special effects. It works well for fine lettering, crisp designs, and multicolored patterns.
Flock film has a soft, velvety surface and feels slightly thicker. It is particularly well-suited for larger lettering, simple motifs, and designs that are meant to be tactile.
Self-adhesive vinyl film, on the other hand, is used on smooth, solid surfaces. These include glass, plastic, metal, signs, storage jars, and organizational boxes. Regular vinyl film is not suitable for washable textiles.
Always follow the manufacturer’s instructions for the film. Temperature, pressing time, pressure, and wash resistance can vary significantly depending on the material.
During plotting, a digital plotter file is transferred to the cutting plotter. The plotter cuts along the lines of the design using a small blade to cut through foil, paper, or another suitable material. The design is then weeded and, depending on the material, applied, ironed on, or further processed.
For beginners, simple plotter files with clean lines, few small details, and fonts that aren’t too thin are best. Single-color designs are particularly easy to work with. Multicolor or very intricate designs require more experience with cutting, weeding, and transferring.
The basic equipment includes a cutting plotter, a cutting mat, a weeding tool, suitable vinyl or paper, and a compatible plotter file. For textiles, you’ll also need flex vinyl or flock vinyl, as well as a heat press or an iron. Transfer film is often required for vinyl film.
Textile films, such as flex film and flock film, are usually cut in mirror image because they are applied to the fabric from the back. Self-adhesive vinyl film is not usually cut in mirror image. The film manufacturer’s instructions and the settings in the plotter software are always decisive.
If a plotter film is difficult to weed, the file may be too intricate, or the cutting settings may not be suitable for the material. A dull blade, insufficient cutting pressure, or an incorrect blade depth could also be the cause. Always perform a test cut before cutting the actual design.